Have you experienced the astonishment of pulling out your car’s dipstick only to find it entirely coated in oil, stretching from the base to the very top? This baffling sight often triggers concerns about the well-being of your engine.
Within this article, we’ll delve into the causes behind this peculiar occurrence, demystifying why oil can reach the full length of the dipstick. Moreover, we’ll examine the potential ramifications of having an excessive oil level in the engine and offer insights on rectifying this issue, along with preventative measures to avoid its recurrence.
Join us as we explore the intricacies of this phenomenon and gain a deeper understanding of why your dipstick might reveal such a surprising and worrisome amount of oil.
Also Read: New Struts Making Noise When Turning: Causes, & Solutions
What is the Normal Oil Level on the Dipstick?
The normal oil level on a dipstick serves as a vital indicator of a well-maintained and properly functioning engine. When checking the oil level using the dipstick, ideally, the oil coating should fall between the minimum and maximum marks etched or indicated on the dipstick. These markers delineate the optimal oil level range for the engine to operate efficiently.
An oil level below the minimum mark suggests an insufficient amount of oil in the system, which can lead to inadequate lubrication, potentially causing friction and wear on engine components. Conversely, an oil level exceeding the maximum mark indicates an overfilled engine, which can result in increased pressure, leading to foaming, leaks, or damage to engine seals.
Regularly checking the oil level ensures that the engine operates within the recommended parameters, safeguarding it against potential issues. However, finding the dipstick entirely coated in oil, reaching all the way up, is not within the normal range and can indicate an overfilled condition or other underlying problems.
What causes Oil All the Way Up the Dipstick?

-
Blow-by and Engine Ventilation Problems
Blow-by occurs when combustion gases escape past the piston rings into the crankcase. This can be due to worn rings or issues with the ventilation system. When blow-by happens, pressurized gases carry oil vapor, leading to an increased oil level. It coats the dipstick as the excess oil gets circulated within the engine. Engine ventilation problems exacerbate this issue, causing oil accumulation on the dipstick.
-
Worn Piston Rings and Cylinder Walls
Worn piston rings and cylinder walls fail to seal the combustion chamber properly. As a result, oil can bypass these components and enter the combustion chamber, burning off and causing an elevated oil level in the crankcase. The dipstick reflects this, showing an unusually high oil coating due to the excess oil circulating within the engine.
-
Excessive Oil Fill
Overfilling the engine with oil can cause the oil to foam due to excessive splashing and aeration, leading to an erroneously high oil level on the dipstick. This occurs as the foam settles, coating the dipstick with oil far beyond the normal range, falsely indicating a higher oil level.
-
Faulty Dipstick or Dipstick Tube
A faulty dipstick or dipstick tube can cause inaccurate oil level readings. A dipstick with incorrect calibration or a damaged tube can provide misleading oil level indications, showing oil all the way up the dipstick even when the actual oil level is within the standard range. Ensuring the accuracy and integrity of these components is crucial for obtaining reliable oil level measurements.
-
Clogged Positive Crankcase Ventilation (PCV) System
A clogged or malfunctioning PCV system can lead to a buildup of pressure in the crankcase, causing oil to be pushed past the piston rings and into the combustion chamber. This excess oil can circulate, coating the dipstick and showing an elevated oil level.
-
Coolant Contamination
If there’s a leak or an issue causing coolant to mix with the oil, it can create a higher oil level reading on the dipstick. Coolant mixing with the oil can increase the volume, resulting in the dipstick showing an elevated oil level due to the mixture of both fluids. This could indicate a more severe issue like a blown head gasket or a cracked engine block, requiring immediate attention to prevent further damage.
What Consequences Arise from Overfilling Oil?
Overfilling the oil in your vehicle’s engine can lead to several detrimental consequences that affect the engine’s performance and longevity. It’s crucial to understand these repercussions to avoid potential damage and maintain your vehicle properly.
-
Excessive Pressure and Frothing
When the oil level surpasses the maximum limit, it leads to increased pressure inside the engine. This excess oil can splash against moving engine parts, causing foaming or aeration. The foaming decreases the oil’s lubricating efficiency as air bubbles displace the oil, potentially resulting in inadequate lubrication for vital engine components.
-
Leakage and Seal Damage
Overfilling can exert added pressure on engine seals and gaskets, potentially leading to leaks. The excessive pressure can cause these components to fail, resulting in oil leaks. Such leaks not only create a mess but also reduce the oil available for proper lubrication, further risking engine components.
-
Catalytic Converter Damage
If the overfilled oil causes excessive oil consumption or burning in the engine, the unburned oil may flow into the exhaust system. This oil contamination can harm the catalytic converter, affecting its efficiency and potentially necessitating its replacement.
-
Engine Damage and Reduced Performance
The increased oil level can lead to excessive crankshaft rotation resistance, straining the engine. This can cause the oil pump to work harder, potentially leading to overheating and reduced engine performance. In severe cases, it may even cause mechanical damage to the engine.
-
Potential Environmental Impact
Oil overfill can result in increased emissions due to incomplete combustion and oil entering the exhaust system. This contributes to environmental pollution and may lead to the failure of emission tests in regions with stringent environmental regulations.
What are the steps to Fix an Overfilled Engine?
Here’s a detailed step-by-step guide to fixing an overfilled engine:
Step 1: Identify the Overfill
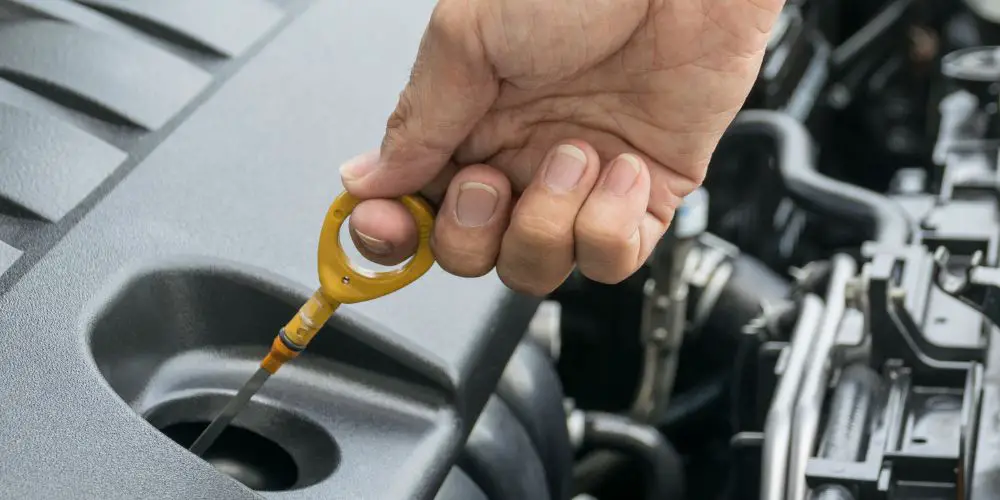
Before addressing the overfilled engine, ensure safety by turning off the engine and allowing it to cool down. Park the vehicle on a level surface to obtain an accurate oil level reading. Locate the engine’s oil dipstick, typically a brightly colored handle labeled “Engine Oil.” Remove the dipstick, wipe it clean with a cloth, reinsert it completely, and then withdraw it to check the oil level. Confirm if the oil level exceeds the maximum mark on the dipstick, indicating an overfilled engine.
Step 2: Drain Excess Oil
Gather necessary tools: an oil pan, gloves, and a wrench suitable for your vehicle’s oil drain plug. Position the oil pan beneath the engine to catch the excess oil. Carefully loosen the drain plug using the wrench, ensuring the pan is placed directly beneath it. Gradually unscrew the plug, allowing the excess oil to drain into the pan. Be cautious to control the flow and tighten the plug to prevent spillage.
Step 3: Inspect for Contamination
Examine the drained oil for any abnormal color, texture, or presence of contaminants, such as coolant or metal particles. Unusual findings might indicate more severe issues requiring professional attention.
Step 4: Replace the Drain Plug and Filter
After draining the excess oil, wipe and reinsert the drain plug securely, avoiding over-tightening. Consider replacing the oil filter to ensure efficient oil filtration. If replacing the filter, ensure you’ve applied a thin film of fresh oil to the new filter’s rubber gasket before installation.
Step 5: Refill with the Correct Amount
Refer to the vehicle’s manual for the recommended type and quantity of oil. Pour the correct amount of oil into the engine through the oil filler cap. Use a funnel to prevent spills. Recheck the oil level using the dipstick to ensure it falls within the appropriate range.
Step 6: Run the Engine and Recheck
Start the engine and let it run for a few minutes to circulate the new oil. Turn off the engine and wait a few minutes for the oil to settle in the oil pan. Check the oil level once more using the dipstick to ensure it’s now within the recommended range.
Step 7: Dispose of Excess Oil Properly
Safely dispose of the excess oil. Seal the drained oil in a suitable container and take it to a recycling center or an approved facility equipped to handle used motor oil, ensuring proper disposal according to environmental guidelines.
Why is oil not showing on the dipstick?

When oil fails to register on the dipstick, it can indicate a potential problem with oil levels in the engine. Several reasons could lead to this issue:
Insufficient Oil
The most apparent reason for oil not appearing on the dipstick is that there might not be enough oil in the engine. This could be due to leaks, oil burning, or improper filling during the last oil change.
Incorrect Dipstick Reading
It’s possible that the dipstick isn’t registering the oil correctly. Sometimes, the dipstick may not be inserted properly or could be the wrong one for the specific engine model.
Oil Depletion or Contamination
If there’s a significant oil leak, the oil may have drained out entirely, leaving the engine with inadequate lubrication. Additionally, if the oil is highly contaminated or diluted, it may not adhere to the dipstick properly.
To fix the issue of the dipstick not showing oil, follow these steps:
Step 1: Confirm Proper Dipstick Insertion
Ensure the dipstick is correctly inserted into the tube and reaches the bottom of the oil pan to get an accurate reading. Use the dipstick that corresponds to your engine’s specifications.
Step 2: Check for Leaks
Inspect the area where the vehicle is usually parked for any signs of oil spots or puddles, indicating a leak. Address any identified leaks promptly.
Step 3: Add Oil
If the dipstick still shows low or no oil, add a small quantity of oil according to the manufacturer’s recommended grade and amount. Recheck the oil level using the dipstick after adding the oil.
Step 4: Monitor Oil Consumption
Keep track of the oil level over time. If the oil continues to deplete without any noticeable leaks, there might be an underlying issue with the engine burning oil, warranting further investigation by a professional.
Step 5: Seek Professional Assistance
If the problem persists or if you suspect a more significant issue, such as internal engine problems, it’s advisable to consult a mechanic or automotive professional to diagnose and rectify the underlying cause.
Regular maintenance, including proper oil changes and periodic checks, is crucial for a vehicle’s health. Always adhere to the manufacturer’s guidelines for the correct type and amount of oil required for your specific vehicle. If in doubt or unable to resolve the issue, professional assistance is highly recommended.
What is called Oil Dilution?
Oil dilution refers to a condition where fuel or other substances mix with the engine oil, reducing its viscosity and lubricating properties. This dilution lowers the oil’s effectiveness in protecting the engine, potentially causing various issues if left unresolved.
What causes Oil Dilution?
Oil dilution can result from several factors:
- Short Distance Driving
Engines operating at low temperatures for short distances might not reach the optimal operating temperature. This can lead to incomplete combustion, allowing unburned fuel to seep past the piston rings into the oil.
- Cold Weather Conditions
In colder climates, vehicles tend to run richer fuel mixtures to aid cold starts. This richness can result in excess fuel not being burned off, leading to fuel contamination of the oil.
- Issues with Fuel Injection or Combustion
Malfunctioning fuel injectors or problems with the combustion process can cause fuel to seep past the piston rings and mix with the engine oil.
- Worn Piston Rings
Worn or damaged piston rings might fail to form a complete seal, allowing fuel to bypass and mix with the oil.
What are the consequences of Oil Dilution?
Oil dilution can lead to severe implications:
Reduced Lubrication
Diluted oil loses its ability to properly lubricate engine components, potentially causing increased friction and premature wear on critical parts.
Engine Damage
Inadequate lubrication can lead to severe engine damage, affecting performance and potentially causing overheating or catastrophic failures.
Reduced Viscosity and Performance
Diluted oil loses its viscosity, affecting its ability to maintain proper pressure and protect engine components, resulting in reduced performance and efficiency.
Potential Corrosion
Fuel mixed with oil can increase the potential for corrosion within the engine, affecting its longevity and functionality.
How to prevent Oil Overfill and Dilution?
Preventing oil overfill and dilution primarily involves regular maintenance and adhering to recommended oil change practices. Here’s how to do it:
- Follow Manufacturer Guidelines: Always adhere to the manufacturer’s recommendations for the type and viscosity of oil suitable for your vehicle. Refer to the owner’s manual for the correct oil type, change intervals, and the recommended oil level.
- Monitor Oil Levels: Regularly check the oil level using the dipstick, especially after refueling or before long trips. Ensure the vehicle is parked on a level surface and the engine is cold to get an accurate reading.
- Avoid Overfilling: During oil changes, add the appropriate amount of oil as per the manufacturer’s recommendations. Overfilling can lead to oil foaming, which may cause engine damage or dilution.
- Proper Warm-Up: Allow the engine to warm up adequately before driving, especially in colder climates. This helps reach optimal operating temperatures, reducing the chances of oil dilution.
- Regular Maintenance: Maintain your vehicle in good condition. Address issues with fuel injectors, piston rings, and other engine components promptly. Follow a scheduled maintenance plan that includes checking for potential problems that could lead to oil dilution.
- Use Quality Fuel: High-quality fuel can aid in efficient combustion and reduce the likelihood of unburned fuel mixing with the engine oil.
- Schedule Timely Oil Changes: Change the oil at regular intervals according to the manufacturer’s recommendations. Fresh oil ensures proper lubrication and helps prevent oil dilution from contaminants.
- Professional Inspection: If you suspect oil overfill or dilution, seek professional assistance. Mechanics can diagnose potential issues, rectify problems, and offer guidance on maintaining proper oil levels.
FAQs: Why Is There Oil All the Way Up the Dipstick?
What causes oil dilution in the engine?
Oil dilution occurs when fuel mixes with the engine oil. Causes include short-distance driving, cold weather that prevents the engine from reaching optimal temperature, faulty fuel injectors leading to incomplete combustion, and worn piston rings allowing fuel to bypass into the oil.
How can I prevent oil all the way up the dipstick?
To prevent the dipstick from showing oil all the way up, ensure the engine reaches optimal operating temperature, perform regular oil level checks, follow proper oil change procedures, and promptly address any issues that might cause overfilling or oil dilution.
What are the symptoms of oil dilution?
Symptoms of oil dilution include reduced engine performance, a fuel-like odor in the oil, increased oil level on the dipstick, and potential oil contamination due to excess fuel mixing with the engine oil.
What if oil is too high on the dipstick?
If the oil level on the dipstick is excessively high, it could indicate overfilling or oil dilution. This could cause increased pressure, oil foaming, inadequate lubrication, and potential engine damage.
What causes oil to come through the dipstick?
Oil coming through the dipstick can be due to increased pressure in the crankcase caused by overfilling, a malfunctioning Positive Crankcase Ventilation (PCV) system, or other factors that lead to increased pressure in the engine.
What happens if you overfill engine oil?
Overfilling the engine can lead to increased pressure, causing oil foaming, inadequate lubrication, potential damage to engine components, reduced performance, and in severe cases, mechanical failure.
Why is oil higher on one side of the dipstick?
The oil appearing higher on one side of the dipstick could be due to the dipstick tube’s positioning or how the oil settles in the oil pan after the engine is turned off. To get an accurate reading, take the average measurement from the dipstick markings.
Should oil be at full on dipstick?
Ideally, the oil level should be between the minimum and maximum marks on the dipstick. It’s crucial not to exceed the maximum mark to prevent overfilling and potential engine damage.
How high should my engine oil be on dipstick?
The engine oil level should fall between the minimum and maximum marks on the dipstick, ensuring it remains within the optimal range for proper engine lubrication without overfilling.
What does oil level too high mean?
An oil level that is too high on the dipstick suggests overfilling, leading to increased pressure, potential oil foaming, reduced lubrication, and the risk of engine damage.
What causes high oil pressure? How do you fix high oil pressure?
High oil pressure could result from a clogged oil filter, a malfunctioning oil pump, or overfilled engine oil. To address high oil pressure, inspect and rectify issues with the oil filter, oil pump, and ensure the oil level is within the recommended range during oil changes.
Conclusion
Maintaining optimal oil levels is critical for the health and performance of your engine. Overfilling or oil dilution can lead to various issues, from decreased engine efficiency to potential damage. Regular oil checks, following manufacturer guidelines, and addressing any abnormalities promptly are key.
Whether it’s preventing oil from reaching too high on the dipstick, understanding symptoms of oil dilution, or addressing high oil pressure, being vigilant and taking necessary precautions during oil changes and engine maintenance will ensure a healthy and smoothly operating engine for the long term.