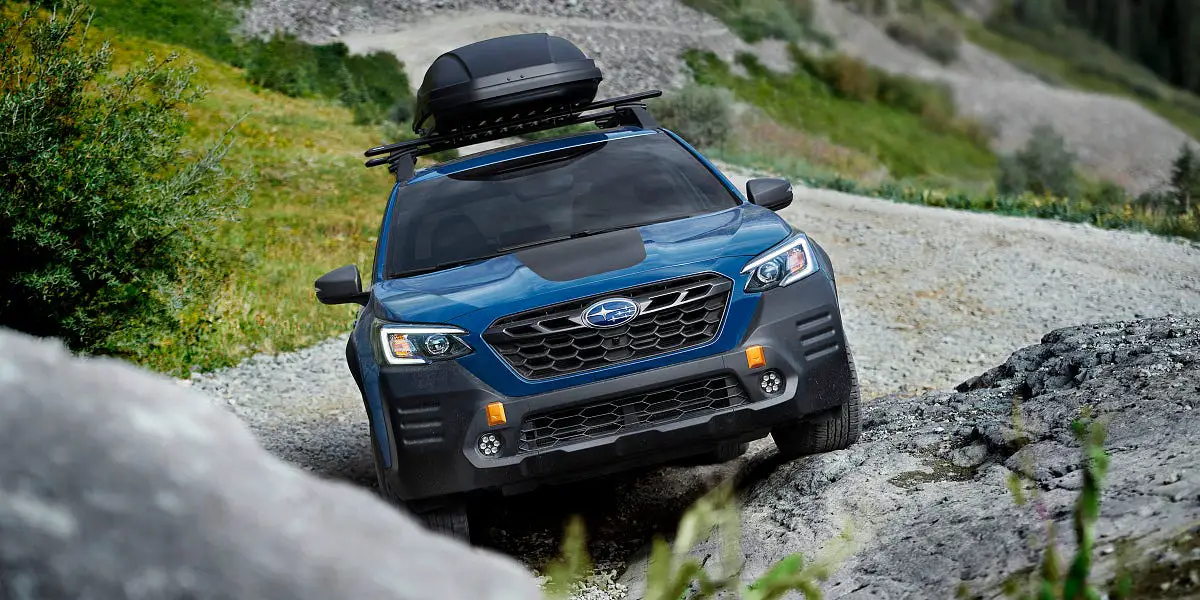
Setting off on a journey in your Subaru Outback should be a seamless experience, but a finicky roof rack can turn it into a frustrating ordeal.
A Subaru Outback roof rack problem might seem trivial, but it can seriously hinder your travel plans.
Worry not, as this article is your handy guide to overcoming these common issues.
With clear, easy-to-follow advice, we’ll help you resolve any rack-related troubles so your adventures can be all about the destinations, not the disruptions.
Get ready to fix those quirks and ensure your Outback is adventure-ready!
What Are The Common Signs Of A Subaru Outback Roof Rack Problem?
Recognizing the signs of a Subaru Outback roof rack problem is crucial for ensuring your vehicle is safe and ready for travel. Here are the common indicators that there might be an issue with your roof rack:
-
Unusual Noises
Rattling, whistling, or howling sounds while driving can signal loose components or improper installation.
-
Visible Wear or Damage
Cracks, rust, or bent parts on the roof rack can compromise its integrity and safety.
-
Difficulty Mounting or Dismounting
If attaching or removing the roof rack has become challenging, there may be a problem with the mounting system.
-
Movement or Shifting
A secure roof rack should not move. If it shifts while in use, it’s a sign that it’s not properly affixed.
-
Water Leakage
Signs of water inside the vehicle around the roof rack mounts could indicate a sealant issue.
-
Difficulty Loading
Struggling to load items or noticing that they don’t sit flush may point to a misalignment or structural problem.
How Can You Diagnose Stability Issues With Your Roof Rack?
Diagnosing stability issues with your Subaru Outback roof rack is essential to ensure a safe and secure load during your travels. This is how to identify and address these concerns:
-
Visual Inspection
Begin with a thorough visual check of the roof rack. Look for any signs of damage, such as bent bars or broken mounting points. Ensure that all components are intact and that there are no missing parts.
-
Physical Check
After the visual inspection, physically test the roof rack by gently pushing and pulling on it to assess its movement. A stable roof rack should have minimal to no give. If there is noticeable play or movement, this could indicate loose fittings or worn-out components.
-
Check the Tightness of Fittings
Use appropriate tools to check the tightness of all bolts and screws. They should be snug but not overtightened, as this can strip the threads or damage the rack.
-
Assess the Mounting Points
The points where the roof rack attaches to the vehicle are critical for stability. Ensure that the mounting points are not corroded and that the seals are intact to prevent water ingress.
-
Load Test
Place a moderate amount of weight on the rack and drive a short distance on a bumpy road. Listen for any unusual noises and observe if the rack maintains its position. Adjustments may be needed if the rack moves or makes noise.
-
Check for Alignment
Make sure the roof rack is properly aligned with the vehicle’s roof. Misalignment can cause aerodynamic drag and instability at higher speeds.
-
Inspect the Locking Mechanisms
If your roof rack has locking mechanisms, ensure they are functioning correctly. Faulty locks can lead to a rack becoming unstable during transit.
Also Read: Don’t Be Boring, Get a 2023 Chrysler 300 S!
What Steps Should You Take To Securely Mount Your Roof Rack?
Securing your Subaru Outback roof rack properly is vital for safety and functionality. This is how you ensure it’s mounted correctly:
Read the Manual: Start by thoroughly reading the manufacturer’s manual for specific instructions related to your Subaru Outback model.
Gather Necessary Tools: Ensure you have all the necessary tools on hand, typically including a wrench, screwdriver, and possibly a torque wrench for precise tightening.
Clean the Mounting Area: Clean the roof of your vehicle where the rack will be mounted. Any dirt or debris can prevent a secure fit.
Position the Rack Correctly: Place the roof rack on the vehicle’s roof, aligning it with the mounting points. Make sure it’s centered to distribute weight evenly.
Attach Mounting Hardware: Secure the mounting hardware to the designated points on the roof. If your model uses clamps, ensure they’re hooked under the door frames or roof rails.
Tighten Bolts Evenly: Tighten all bolts and screws evenly, working in a cross pattern to apply uniform pressure. Avoid over-tightening, which can damage the rack or your vehicle.
Use a Torque Wrench: If specified by the manual, use a torque wrench to tighten the bolts to the recommended torque setting.
Check for Movement: After mounting, gently shake the rack to ensure there is no movement. If there is, recheck all connections.
Perform a Test Drive: Take a short test drive to listen for any noise or signs of movement, which could indicate the need for further adjustments.
Regular Checks: Regularly check the roof rack’s security, especially before long trips or after carrying heavy loads.

Are There Quick Fixes For A Noisy Subaru Outback Roof Rack?
A noisy roof rack on your Subaru Outback can be quite bothersome, but there are several quick fixes you can try to alleviate the issue:
Reposition of the Crossbars: Sometimes, simply adjusting the position of the crossbars can reduce noise. Experiment with different placements to find a quieter setup.
Tighten All Connections: Loose components can lead to noise. Make sure all parts of the roof rack are securely fastened.
Add Rubber Padding: Placing rubber padding or a rubber strip on the crossbars can help dampen noise by disrupting airflow.
Use a Wind Fairing: A wind fairing, or a wind deflector, can be attached to the front of the roof rack to redirect airflow and reduce noise.
Lubricate Joints: If there are any moving parts or joints, applying lubricant can prevent squeaking noises.
Check for Debris: Clear any debris or leaves that may have gotten stuck in the roof rack, as these can cause whistling sounds when driving.
Inspect for Damage: Any damaged parts can cause turbulence and noise, so replace them if necessary.
Secure Cargo Properly: Ensure that any cargo is tightly secured, as loose items can vibrate and create noise.
How Do You Maintain Your Roof Rack To Prevent Future Problems?
Maintaining your Subaru Outback roof rack is key to ensuring its longevity and functionality. Here’s a comprehensive approach to keeping your roof rack in top condition:
-
Regular Inspections
Periodically inspect your roof rack for any signs of wear, damage, or corrosion. Look for cracks, rust, or loose components that could indicate a need for repair or replacement.
-
Cleaning
Keep the roof rack clean from dirt, debris, and road salts that can cause corrosion. Use mild soap and water for cleaning and avoid abrasive materials that can scratch the surface.
-
Tightening Hardware
Check and tighten all bolts, nuts, and screws regularly. Vibrations from driving can loosen connections over time.
-
Lubrication
Apply a silicone-based lubricant to moving parts to ensure smooth operation and to prevent rust.
-
Protective Coating
Consider applying a protective coating or wax to metal parts to guard against rust and weather elements.
-
Proper Use
Always follow the manufacturer’s guidelines for weight limits and loading procedures to avoid overstressing the roof rack.
-
Storage
If the roof rack is not in use, store it in a dry, covered place to protect it from the elements.
-
Replacement Parts
Use only genuine replacement parts that are designed for your specific roof rack model to ensure proper fit and function.
-
Professional Check
Have a professional check your roof rack periodically, especially if you frequently carry heavy loads or travel in harsh conditions.
Can Improper Installation Cause Long-Term Damage To Your Roof Rack?
Yes, improper installation of a roof rack can indeed lead to long-term damage. Here’s how:
Structural Stress
Incorrectly mounted roof racks can cause undue stress on the vehicle’s roof, potentially leading to dents or warping over time.
Increased Wear
Roof racks not secured properly may move or vibrate, which can wear down the mounting points and the rack itself.
Corrosion
Failing to install with proper sealing can allow water ingress, leading to rust and corrosion at the attachment points.
Aerodynamic Issues
A roof rack that’s not aligned correctly can disrupt the airflow over the vehicle, which might result in reduced fuel efficiency and increased noise.
Safety Risks
An unstable roof rack can compromise the safety of the load carried, posing a risk to the vehicle’s occupants and other road users.
What Are The Best Practices For Loading And Unloading Your Roof Rack?
When loading and unloading your Subaru Outback roof rack, following best practices is essential for safety and efficiency. They include:
-
Check Weight Limits
Always adhere to the weight limits specified by your roof rack and vehicle manufacturer to prevent overloading.
-
Even Weight Distribution
Place items on the roof rack so that the weight is evenly distributed. This helps maintain the vehicle’s balance and stability.
-
Heaviest Items First
Load the heaviest items first, positioning them towards the center of the rack, closest to the vehicle’s roof.
-
Secure All Items
Use straps, ropes, or bungee cords to secure all items on the rack. Ensure that nothing is loose or able to move around.
-
Padding Between Items
To prevent damage, place padding between items that might rub or knock against each other.
-
Aerodynamics
Consider the aerodynamics when loading. Place larger items at the front, tapering to smaller items at the back, to reduce wind resistance.
-
Accessibility
Load items in an order that makes them easily accessible upon arrival. Frequently needed items should be placed last, so they are first to unload.
-
Use a Step Stool
A step stool can provide safe access to the roof rack, preventing overreaching and potential falls.
-
Regular Breaks
On long trips, take regular breaks to check the security of the load and make any necessary adjustments.
-
Unloading
When unloading, reverse the loading process. Remove the top and most accessible items first, working your way down to the heaviest items.

How Do Weather Conditions Affect Your Subaru Outback Roof Rack?
Weather conditions can significantly impact your Subaru Outback roof rack in various ways:
-
Heat and Sun Exposure
Prolonged exposure to the sun can cause the materials of the roof rack to degrade over time, leading to brittleness and potential cracking.
-
Cold and Ice
In colder climates, ice can form on the roof rack, making it difficult to secure items properly. The contraction and expansion of materials in extreme cold can also weaken joints and fixtures.
-
Wind
Strong winds can increase the load on the roof rack and the items secured to it, potentially leading to instability or damage if not properly secured.
-
Rain and Moisture
Water can seep into the crevices of the roof rack, leading to rust or corrosion, especially if the protective coating is damaged.
-
Salt and Sand
In coastal areas or places where roads are salted for ice, these materials can corrode metal components of the roof rack.
What Tools Are Essential For Fixing A Roof Rack On Your Own?
To fix a roof rack on your own, you’ll need a set of essential tools that will help you handle most issues that may arise. Here’s a list of the basic tools you should have:
Screwdrivers: A set of screwdrivers with various head sizes is crucial for tightening or loosening screws on the roof rack.
Wrenches: Adjustable wrenches are necessary for bolts and nuts that may need tightening or replacing.
Ratchet and Socket Set: This will help you with bolts that are hard to reach or require more torque than a wrench can provide.
Torque Wrench: To ensure that all fittings are tightened to the manufacturer’s specifications without being over-tightened.
Allen Keys/Hex Wrenches: Many roof racks use hex bolts, so a set of these is essential.
Pliers: Useful for gripping and bending metal parts, or holding a nut in place.
Rubber Mallet: Helpful for gently tapping parts into place without causing damage.
Tape Measure: For measuring distances and ensuring your roof rack is centered.
Level: To make sure the roof rack is perfectly horizontal and evenly distributed.
Utility Knife: For cutting any straps or removing old sealant if necessary.
Silicone Lubricant: To keep moving parts functioning smoothly and to prevent rust.
Sealant: For waterproofing any areas where the roof rack is attached to the car.
Is It Time To Replace Your Roof Rack Or Can It Be Repaired?
Deciding whether to repair or replace your roof rack depends on several factors. Here’s what to consider:
-
Wear and Tear
If your roof rack has been in use for many years and shows significant wear, it might be more cost-effective to replace it.
-
Rust
Rust can compromise the structural integrity of the roof rack. Minor rust might be treatable, but extensive corrosion typically calls for replacement.
-
Overload Damage
If the roof rack has been overloaded and is bent or damaged, it may not be safe to repair.
-
Availability of Parts
Check if replacement parts are available. If you can’t find the necessary components, or if they’re costly, replacing the entire rack might be the better option.
-
A Newer Solution
Technology and design improvements might mean that newer models offer better features or improved safety, which could justify an upgrade.
-
Cost Comparison
Weigh the cost of repairs against a new purchase. If repairs are close to the price of a new rack, replacement might be the smarter choice.
-
Safety
Ultimately, safety is paramount. If there’s any doubt about the reliability of the repaired rack, opt for a new one.
How Does Excess Weight Impact The Performance Of Your Roof Rack?
Excess weight on a roof rack can have several negative impacts on the performance of your vehicle:
-
Handling
The additional weight, especially if it’s above the vehicle’s center of gravity, can make the vehicle harder to handle. It may become less responsive to steering inputs and more prone to swaying on turns.
-
Braking
Extra weight increases the distance required to come to a complete stop. This can be particularly dangerous in emergency braking situations.
-
Acceleration
The engine has to work harder to move the extra weight, which can lead to slower acceleration.
-
Fuel Efficiency
The added weight and potentially increased wind resistance can decrease fuel efficiency.
-
Structural Stress
Overloading can put undue stress on the roof rack’s structure and the vehicle’s roof, potentially leading to damage over time.
-
Risk of Rollover
A higher center of gravity increases the risk of a rollover, especially during abrupt maneuvers.
-
Tire Wear
Additional weight can cause increased tire wear, particularly if the tires are not properly inflated for the load.
Conclusion
Addressing a Subaru Outback roof rack problem doesn’t have to be a roadblock to your adventures.
With the insights and solutions provided, you’re now equipped to tackle any issue head-on, ensuring your roof rack is as resilient and ready as you are.
Remember, regular maintenance and proper care are your best tools for a hassle-free journey.
So, load up, secure your gear, and hit the open road with the confidence that your Subaru Outback is fully prepared to carry you—and your cargo—to your next destination.
Safe travels!