In automobiles, the camshaft position sensor plays a crucial role in the engine’s internal combustion process. This small yet essential component quietly ensures your vehicle’s engine runs smoothly.
However, just like any hero, it can face issues over time. A faulty camshaft position sensor can lead to various problems, such as difficulty starting your car and reduced fuel efficiency. The good news is that you can fix it.
In this article, we’ll delve into the details of resetting or “relearning” a replacement sensor. While you can’t magically reset a failing sensor, we’ll explain how to recalibrate a new one. Your car’s well-being is our priority, so keep reading to discover how to keep your engine running smoothly.
Understanding the Camshaft Position Sensor

The Crucial Role of the Camshaft Position Sensor
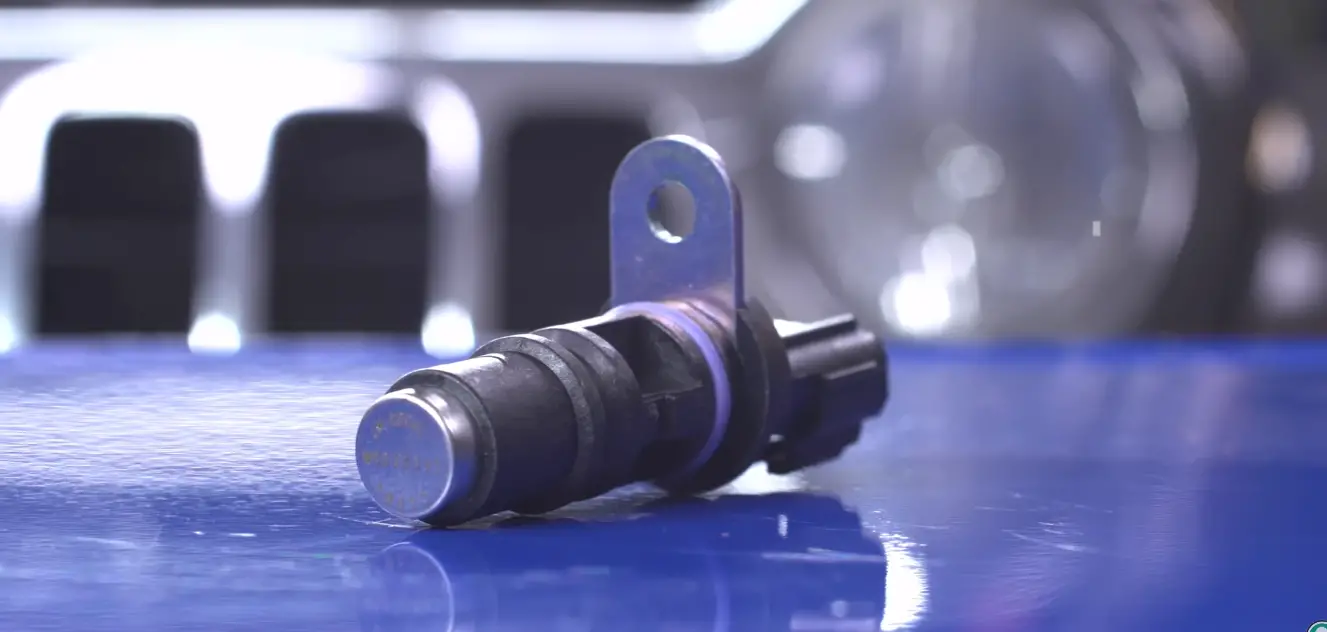
- The camshaft position sensor is a compact but indispensable component of your vehicle’s engine.
- It plays a pivotal role in synchronizing the engine’s operation by continuously monitoring the camshaft’s position.
- This sensor ensures the precise timing of critical functions, such as fuel injection and combustion, which is essential for optimizing performance and fuel efficiency.
The Necessity of Resetting a Faulty Sensor
- Over time, even the most reliable components can experience wear and tear, leading to sensor malfunction.
- A malfunctioning camshaft position sensor can disrupt the harmonious orchestration of the engine, resulting in issues such as poor fuel efficiency, difficulty starting, and sputtering while driving.
- Resetting, or more accurately, “relearning,” a faulty sensor is crucial to restore its accuracy and reliability.
- It’s akin to retraining the sensor to interpret and relay data accurately, allowing your engine to operate as intended.
Resetting vs. Relearning
It’s essential to clarify the difference between resetting and relearning.
- While “resetting” suggests returning a faulty sensor to its initial state, this is typically not possible. Faulty sensors usually require replacement.
- The term “relearning” is more fitting; it involves calibrating a new sensor to work seamlessly with your engine.
- This recalibration ensures that the sensor accurately interprets the camshaft’s position, allowing your engine to function optimally.
- Attempting to reset an existing faulty sensor is rarely feasible and often ineffective, making sensor replacement the preferred approach for addressing such issues.
Replacing a Faulty Camshaft Position Sensor
When you’re confronted with a troublesome camshaft position sensor, the solution typically involves replacing it.
Locating the Sensor

Finding the camshaft position sensor can sometimes feel like a treasure hunt because its placement varies depending on the make and model of your vehicle. Here’s how to locate it:
- First, consult your vehicle’s owner’s manual. Often, the manual provides precise information on the sensor’s location. If the manual doesn’t offer this guidance, a brief online search or professional assistance can help.
- Generally, you’ll discover the sensor positioned to the left of the engine, attached to the engine’s left side, or mounted either on the rear or front of the cylinder head, often beneath the timing belt cover.
Removing the Old Sensor

Removing the old sensor is a manageable task with the right tools and a systematic approach:
- Utilize a 10mm socket wrench to gently loosen the two bolts securing the disc-shaped sensor in place. Be cautious to ensure a proper fit, which prevents damage during removal.
- Sometimes, obstructions like tubes might be in your way. In such cases, carefully remove these obstacles, making sure to document or photograph their positions for accurate reinstallation.
- Next, unclip the wire connector. Start by gently popping out the red tab on the side of the sensor using a small screwdriver. Then, squeeze the base of the wire connector to release it from the sensor, placing it aside in the engine bay.
- If you happen to spot any damage to the wires or connector clip during this process, it’s essential to understand that merely replacing the sensor may not resolve the issue. Unless you possess advanced auto repair skills, it’s advisable to seek professional assistance.
Selecting the Perfect Replacement

Selecting the appropriate replacement sensor is critical for a successful outcome. Here’s how to go about it:
- Ideally, bring the old sensor with you to the auto parts store to ensure a precise match. This method significantly reduces the chances of compatibility issues.
- However, if transporting the old sensor isn’t feasible, explore alternative solutions such as getting a ride to the store or taking detailed pictures for reference.
- Always verify that the replacement sensor corresponds precisely to your vehicle’s make, model, and year to guarantee a seamless installation.
The replacement of a malfunctioning camshaft position sensor requires meticulous attention to detail. This essential process lays the foundation for an engine that runs more smoothly, resulting in an improved driving experience.
Also Read: Fuel Injector Guide: Replacement, Lifespan, Cleaning & Testing
Installing the New Sensor
-
Reversing the Process
The installation of a new camshaft position sensor is a straightforward process, essentially mirroring the steps taken when removing the old one. You’ll want to position the new sensor in precisely the same spot from which you removed the old sensor.
-
Securing with Precision
The proper installation of the new sensor is essential for it to function accurately. Using a 10mm socket wrench, gently tighten the two bolts to secure the sensor in place. This snug fit is crucial to its performance.
-
Cautious Tightening
While ensuring a secure fit is vital, it’s equally important to exercise caution when tightening the bolts. Overtightening can result in damage to the sensor, especially due to its delicate plastic disc.
-
Post-Installation Recalibration
After successfully installing the new sensor, the process is not quite complete. It’s highly recommended to perform a sensor “relearn” or recalibration process.
This recalibration aligns the sensor with your engine’s specific requirements, ensuring optimal performance and harmonious operation.
The installation of a new camshaft position sensor is the reverse of removal, involving the secure placement, cautious bolt tightening, and culminating in a recalibration step. This final recalibration is the crucial touch that guarantees your engine operates precisely as intended. The sensor now functions seamlessly, contributing to your vehicle’s smooth performance and reliability.
How to “Relearn” a New Sensor
Relearning a new camshaft position sensor after installation is a crucial step to ensure proper calibration, harmonizing the sensor with your engine’s requirements. This recalibration process is essential for optimal performance, making it a step you shouldn’t overlook.
One option to perform this recalibration is by using an advanced OBD-II scanner. These sophisticated devices provide the tools needed to execute a CASE (Crank Angle Sensor Error) relearn, a specific procedure that aligns the camshaft and crankshaft sensors. Here’s a breakdown of how to perform a CASE relearn using an advanced OBD-II scanner:
Connect the Scanner
- Start by attaching the OBD-II scanner to your vehicle. The scanner’s pin connector is typically located beneath and to the driver’s side of the steering wheel. Ensure it’s securely connected to establish communication between the scanner and your vehicle.
Select the Relearn Option
- Follow the instructions provided with your OBD-II scanner to navigate its menu. You’re looking for the option to run a CASE relearn. This may vary depending on the scanner’s model, so it’s important to consult the product instructions.
- Once you’ve located the relearn option, select it to initiate the process.
Complete the Relearn
- The scanner will guide you through the relearning process with on-screen prompts. Follow these prompts precisely to ensure a successful recalibration.
- Once the relearn is complete, disconnect the OBD-II scanner from your vehicle and resume driving it as you normally would.
However, not everyone may have access to an advanced OBD-II scanner, and there’s an alternative method to relearn the sensor without one. Here’s how:
Drive in a Specific Procedure
- While not guaranteed to work with all vehicle makes and models, this method can be effective in some cases.
- Start by turning off all vehicle accessories such as the radio and air conditioning.
- Ensure that the air temperature sensor and coolant temperature are within 9 degrees Fahrenheit (5 degrees Celsius) of each other.
- Begin the engine and let it idle in either Park or Neutral for two minutes.
- Gradually accelerate to 55 mph (90 km/h) at partial throttle. Maintain this speed for 8-10 minutes to allow the engine to reach its operating temperature.
- Continue cruising at 55 mph (90 km/h) for an additional 5-6 minutes.
- Decelerate to 45 mph (72 km/h) without using the brakes and maintain this speed for 1 minute.
- Repeat four deceleration cycles, without using the brakes, for 25 seconds each. Return to 45 mph (72 km/h) for 15 seconds between each deceleration cycle.
- Accelerate to 55 mph (90 km/h) and cruise for 2 minutes.
- Finally, stop the vehicle, idle for 2 minutes with the brake applied, and the transmission in Drive or Neutral (or with the clutch depressed).
Relearning Without an OBD-II Scanner
For those without access to an advanced OBD-II scanner, relearning a new camshaft position sensor is still entirely achievable. While OBD-II scanners offer precision and convenience, an alternative method, known as the “no-scanner CASE relearn,” can effectively recalibrate the sensor without the need for advanced diagnostic equipment. While it’s essential to acknowledge that this method may not guarantee success with every vehicle, it has proven to be quite effective in numerous cases.
Here is a comprehensive guide on how to perform a no-scanner CASE relearn:
-
Disable Accessories
Initiate the process by turning off all vehicle accessories, including the radio and air conditioning. This step ensures that the engine is operating under consistent conditions for the relearn.
-
Temperature Alignment
Verify that the air temperature sensor and the coolant temperature are within 9 degrees Fahrenheit (5 degrees Celsius) of each other. Temperature alignment is crucial for the relearning process to be effective.
-
Engine Idle
Start the engine and allow it to idle in either Park or Neutral for a period of two minutes. This idle phase prepares the engine for the subsequent relearning steps.
-
Smooth Acceleration
Gradually accelerate the vehicle to 55 mph (90 km/h) at partial throttle. Maintain this speed for a duration of 8-10 minutes to enable the engine to reach its optimal operating temperature.
-
Sustained Speed
Continue cruising at 55 mph (90 km/h) for an additional 5-6 minutes. This extended cruising period is essential for the recalibration process to occur effectively.
-
Controlled Deceleration
Decelerate the vehicle to 45 mph (72 km/h) without using the brakes and maintain this speed for one minute.
-
Deceleration Cycles
Execute four deceleration cycles, each lasting for 25 seconds, without utilizing the brakes. Return to 45 mph (72 km/h) for 15 seconds between each deceleration cycle.
-
Final Acceleration
Accelerate the vehicle to 55 mph (90 km/h) and maintain this speed for two minutes, ensuring smooth and steady acceleration.
-
Concluding Steps
Finish the relearning process by stopping the vehicle and idling for two minutes with the brake applied. The transmission should be in Drive or Neutral (or with the clutch depressed).
While it’s important to note that this no-scanner CASE relearn method may not be universally effective with all vehicle makes and models, it has demonstrated success in a significant number of cases. A key indicator of a successful relearn is the extinguishing of the “check engine” light. When this warning light goes out, you can be confident that the camshaft position sensor has been recalibrated, contributing to improved engine performance, precision, and reliability. This ensures your vehicle operates as intended, providing a smoother and more efficient driving experience.
Also Read: Uncovering 2022 GM 6.2 Engine Problems: A Comprehensive Guide
Signs of Camshaft Position Sensor Trouble
Recognizing the signs of a faulty camshaft position sensor is crucial for maintaining your vehicle’s performance and preventing further damage. Here are some common symptoms and their explanations:
- “Check Engine” Light
The most evident indication of sensor trouble is the illumination of the “check engine” light on your dashboard. This serves as a general warning, signaling that something is amiss within the engine. For an accurate diagnosis, an OBD-II scanner or professional inspection is necessary.
- Difficulty Starting the Vehicle
A malfunctioning camshaft position sensor can disrupt fuel injection timing, making it challenging to start the vehicle. Initially, this may cause intermittent starting issues, but over time, it can deteriorate to the point where the vehicle fails to start altogether.
- Sputtering While Driving
Smooth engine operation during driving is reliant on precise fuel injection timing. A faulty sensor can result in sputtering, causing acceleration delays and even stalls. This can significantly impact your driving experience and vehicle performance.
- Poor Fuel Efficiency
When fuel injection timing is compromised, it leads to inefficient combustion and fuel wastage. A faulty camshaft position sensor can contribute to reduced fuel economy, causing you to spend more at the pump.
- Transmission Problems
The camshaft position sensor communicates with the powertrain control module (PCM), which affects the transmission’s shifting process. A malfunctioning sensor can lead to inconsistent shifting, ultimately causing transmission issues. In severe cases, the transmission may lock up or be unable to shift at all.
Conclusion
This article has provided essential insights into camshaft position sensors. We’ve discussed the importance of understanding, replacing, and relearning these sensors for optimal vehicle performance. Maintaining a properly functioning camshaft position sensor is paramount to ensure a smooth and efficient engine operation. When signs of sensor trouble arise, it’s crucial to address them promptly. Whether through advanced OBD-II scanners or alternative driving procedures, recalibrating the sensor is key. We encourage readers to stay vigilant, act promptly, and follow the guidelines provided to guarantee their vehicle’s reliability and longevity. Your vehicle’s performance depends on it.