Welcome to our guide on How Do You Use A Timing Light with Advance Dial – a must-know for keeping your engine in top shape!
We’ll break down the steps in simple terms, making it easy for both newbies and car pros to follow along.
Timing is crucial for your engine’s performance and health, and we’ll show you how to get it just right.
From the basics of ignition timing to tweaking with the advance dial, we’ve got you covered.
Follow this guide, and you’ll be able to fine-tune your engine’s timing like a pro, ensuring it runs smoothly and stays in great shape for the long haul!
What is Ignition Timing, and Why Does it Matter?
Ignition timing refers to the precise moment when a spark plug ignites the fuel-air mixture in an internal combustion engine.
This timing is crucial because it determines when the spark occurs relative to the position of the pistons in the engine cylinders.
The goal is to initiate combustion at the optimal moment for maximum power, fuel efficiency, and engine performance.
If the timing is off, it can lead to inefficient combustion, reduced power, increased fuel consumption, and even potential engine damage.
In essence, understanding and correctly setting ignition timing is fundamental for maintaining a well-functioning and efficient engine.
How Does a Timing Light Work, and What Are Its Key Components?
A timing light is a fundamental tool for anyone looking to fine-tune the ignition timing of their vehicle.
But how does this device work, and what are its key components?
At its core, a timing light is a strobe light that synchronizes with the engine’s firing cycle, allowing the user to pinpoint the exact moment the spark plug fires during the engine’s rotation.
This synchronization is crucial for adjusting the ignition timing accurately.
The timing light typically consists of a few key components that work together seamlessly.
Firstly, there’s the inductive pickup.
This component clamps around the spark plug wire and detects the electrical pulses generated when the spark plug fires.
The inductive pickup serves as the timing light’s connection to the engine’s ignition system, providing the necessary information for precise timing adjustments.
Connected to the inductive pickup is the main body of the timing light, which houses the control circuitry and the strobe light.
The control circuitry processes the electrical signals received from the inductive pickup and triggers the strobe light to flash in sync with the firing of the spark plug.
This synchronization allows the user to see the timing marks on the engine’s crankshaft or harmonic balancer while the engine is running.
What Are the Step-by-Step Instructions for Using a Timing Light with advance dial?
Using a timing light with an advance dial may sound complex, but with a systematic approach, it becomes an accessible process. Follow these step-by-step instructions to effectively use a timing light with an advance dial for precise adjustments:
Step 1: Prepare Your Workspace
Before starting, ensure that the engine is turned off and allow it to cool if it has been running. Position your vehicle in a well-lit area, and if possible, have a friend assist you with the process.
Step 2: Locate the Timing Marks
Identify the timing marks on the engine. These are typically found on the crankshaft pulley or harmonic balancer. Familiarize yourself with the markings for top dead center (TDC) and the advance or retardation degrees.
Step 3: Connect the Timing Light
Attach the inductive pickup of the timing light to the spark plug wire of the cylinder you’re working on. Ensure a secure connection, as this is crucial for accurate readings.
Step 4: Adjust the Advance Dial
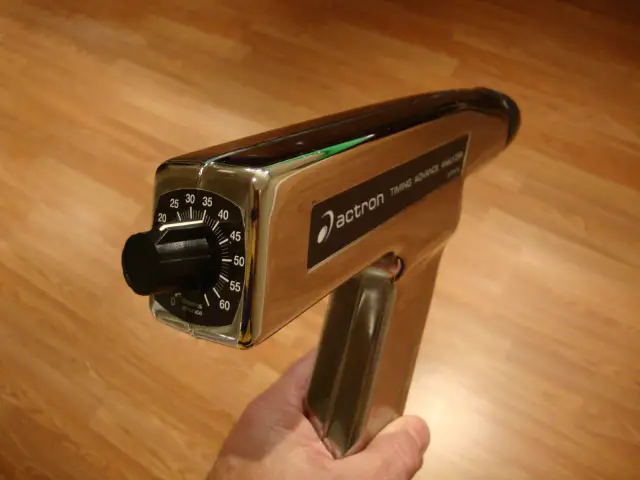
If your timing light comes with an advance dial, locate it on the light’s main body. Set the advance dial to zero initially. This means the timing light will provide readings without any advance or retardation.
Step 5: Start the Engine
With the timing light connected and the advance dial set to zero, start the engine. Allow it to warm up to its normal operating temperature.
Step 6: Aim the Timing Light
Point the timing light at the timing marks. The flashing of the timing light will synchronize with the firing of the spark plug. Observe the timing marks and note the initial timing reading.
Step 7: Adjust the Advance Dial Gradually
Begin adjusting the advance dial incrementally in the desired direction (advance or retard). Small adjustments are key here. Monitor the timing marks with each adjustment, aiming for the target timing specified in your vehicle’s manual.
Step 8: Check for Smooth Operation
While adjusting the advance dial, pay attention to how the engine operates. Ideally, you want smooth and stable performance. If the engine starts to run unevenly or exhibits signs of stress, it may indicate that the timing is not optimized.
Step 9: Fine-Tune as Needed
Make additional adjustments as necessary to achieve the recommended timing for your engine. Remember, the goal is to find the sweet spot that balances power, efficiency, and smooth operation.
Step 10: Secure the Advance Dial Setting
Once you’ve achieved the desired timing, secure the advance dial to lock in the setting. This ensures that the dial won’t shift unintentionally, maintaining the timing you’ve carefully adjusted.
Why is the Advance Dial Important in Adjusting Timing?

The advance dial plays a pivotal role in adjusting timing by allowing users to control the ignition timing advance or retardation. Ignition timing refers to the precise moment when the spark plug ignites the air-fuel mixture in the engine cylinders. The advance dial introduces an additional layer of control over this ignition timing, influencing the engine’s performance in several key ways.
-
Optimizing Combustion Efficiency
The advance dial enables fine-tuning of ignition timing to achieve optimal combustion efficiency. Advancing the timing means the spark plug fires slightly earlier in the engine’s compression stroke, allowing more time for complete combustion. This can enhance power output and fuel efficiency.
-
Preventing Detonation (Knocking)
Retarding the ignition timing can be beneficial in preventing detonation or knocking. Detonation occurs when the air-fuel mixture ignites prematurely, causing uncontrolled combustion. Retarding the timing delays the ignition, reducing the likelihood of knocking and protecting the engine from potential damage.
-
Adapting to Different Operating Conditions
Engines operate under various conditions, such as idling, acceleration, or cruising. The advance dial provides the flexibility to adjust timing based on these conditions. For example, advancing the timing during acceleration can enhance power, while retarding it during cruising may improve fuel efficiency.
-
Compensating for Modifications
Vehicle modifications, such as changes to the air intake or exhaust system, can alter the engine’s airflow and combustion characteristics. The advance dial allows for adjustments to accommodate these modifications, ensuring that the ignition timing remains optimized for the specific engine setup.
-
Balancing Power and Emissions
Adjusting the ignition timing can influence power output and emissions. The advance dial enables users to strike a balance between maximizing power and minimizing emissions, ensuring compliance with environmental regulations while optimizing engine performance.
-
Catering to Different Fuel Types
Different fuels have varying combustion characteristics. The advance dial allows users to adapt the ignition timing to the specific properties of the fuel being used. This is particularly relevant for engines that may run on alternative fuels or fuel blends.
-
Enhancing Overall Engine Performance
By providing control over the timing of the combustion process, the advance dial contributes to the overall performance of the engine. This includes factors such as throttle response, smooth operation, and the ability to deliver power when needed.
Also Read: Why Check Powertrain Comes On In Holden Commodore VZ SV6? Causes & Solutions!
What Common Issues Can Arise, and What Tips Can Help Troubleshoot Timing Adjustments?
While adjusting timing is a valuable skill, several common issues may arise during the process. Here are some potential challenges and tips to troubleshoot timing adjustments effectively:
-
Difficulty Identifying Timing Marks
- Issue: The timing marks on the engine can be challenging to locate or read.
- Tip: Use chalk or white paint to make the timing marks more visible. Additionally, refer to your vehicle’s manual or online resources for specific guidance on mark location.
-
Inconsistent Timing Readings
- Issue: The timing light provides inconsistent or fluctuating readings.
- Tip: Check for a secure connection between the inductive pickup and the spark plug wire. Ensure there are no frayed wires or loose connections. If the issue persists, consider replacing the timing light.
-
Engine Runs Rough or Stalls
- Issue: After adjusting the timing, the engine runs rough or stalls.
- Tip: Revert to the original timing setting and ensure the engine runs smoothly. Then, make small adjustments to the timing, checking the engine’s performance after each tweak. An abrupt change in operation may indicate an issue with the adjustment.
-
Difficulty Rotating the Distributor
- Issue: The distributor is challenging to rotate for timing adjustments.
- Tip: Loosen the distributor hold-down bolt sufficiently to allow rotation. If it remains difficult, check for any obstructions or mechanical issues in the distributor. Lubricate moving parts if necessary.
-
Ignition Timing Doesn’t Change
- Issue: Adjustments to the advance dial or distributor do not alter the ignition timing.
- Tip: Confirm that the advance dial is functioning correctly. If the issue persists, there may be a problem with the distributor or ignition system that requires professional inspection.
-
Incorrect Timing Setting
- Issue: Difficulty achieving the recommended timing setting.
- Tip: Consult your vehicle’s manual for the specified timing setting. If you’re unable to reach the recommended timing, it could indicate a more significant issue with the ignition system or engine components, requiring professional attention.
-
Excessive Engine Heat
- Issue: Adjusting the timing leads to increased engine temperature.
- Tip: Timing adjustments can affect engine temperature. Ensure the cooling system is functioning correctly, and the radiator is clean. If the problem persists, consider consulting a mechanic to assess the cooling system’s overall health.
-
Spark Plugs Fouling or Overheating
- Issue: Spark plugs foul quickly or show signs of overheating.
- Tip: Incorrect timing can lead to spark plug issues. Recheck the timing and ensure it aligns with the manufacturer’s recommendations. Fouled or overheated spark plugs may also indicate other engine problems that need attention.
FAQs – How Do You Use A Timing Light with Advance Dial?
How Does an Advance Timing Light Work?
An advance timing light works by synchronizing with the engine’s firing cycle. It consists of an inductive pickup that attaches to the spark plug wire. This pickup sends signals to the timing light, which flashes in sync with the firing of the spark plug. The light illuminates the timing marks on the engine, allowing users to adjust the ignition timing with precision.
How Do You Set a Timing Light Dial?
To set a timing light dial, locate the advance dial on the timing light’s main body. Begin by setting the dial to zero. As you start the engine and observe the timing marks, adjust the dial incrementally in the desired direction (advance or retard) until you achieve the recommended timing specified in your vehicle’s manual.
How Do I Know If My Timing Is Too Advanced?
Signs of overly advanced timing include engine knocking or pinging, increased engine temperature, poor idling, and reduced overall performance. If you experience these issues, it’s advisable to check and adjust the timing to ensure it aligns with the manufacturer’s recommendations.
How Do You Set Total Advance Timing?
Setting total advance timing involves adjusting the ignition timing to its maximum advance position. Typically, this is done by advancing the timing until the engine reaches its highest RPM without knocking. Consult your vehicle’s manual for specific instructions on setting total advance timing.
What Is the Normal Timing Advance at Idle?
The normal timing advance at idle varies among vehicles but typically falls within the range of 5 to 20 degrees before top dead center (BTDC). Consult your vehicle’s manual for the specific idle timing recommendation.
What Happens If You Advance Timing Too Much?
Excessive advance timing can lead to engine knocking, overheating, and poor performance. It may also cause damage to the pistons, valves, or other internal components. It’s crucial to stay within the recommended timing range to ensure optimal engine operation.
How Can I Tell If Timing Is Off?
Signs of incorrect timing include difficulty starting the engine, poor fuel efficiency, rough idling, engine misfires, and a decrease in overall power. If you notice any of these symptoms, it’s advisable to check and adjust the timing.
Will Advance Timing Cause Backfire?
Excessive advance timing can cause backfiring, particularly during deceleration. Backfires may occur as a result of unburnt fuel igniting in the exhaust system. Proper timing adjustments can help prevent backfiring.
Can Advanced Timing Cause Misfire?
While advanced timing is generally associated with improved performance, excessive advance can lead to misfires. If you experience misfires, check the timing to ensure it falls within the recommended range.
Can I Set Timing Without a Light?
While using a timing light is the most accurate method, you can set timing without a light by relying on timing marks and manual adjustments. However, this method is less precise and may not achieve optimal results.
Does Advancing Timing Use More Fuel?
Advancing timing can enhance fuel combustion efficiency, potentially leading to improved fuel efficiency. However, advancing timing excessively may lead to engine knocking, which can increase fuel consumption. It’s crucial to find the right balance for optimal performance.
Can You Check Timing Without a Light?
While less accurate, you can check timing without a light by manually aligning timing marks and making adjustments. However, using a timing light provides a more precise and reliable method for setting and verifying timing.
Conclusion – How Do You Use A Timing Light with Advance Dial?
In wrapping up, mastering the art of using a timing light with an advance dial empowers every car enthusiast to keep their engine running smoothly.
From understanding ignition timing basics to making simple adjustments, this guide has covered it all.
Armed with practical tips for troubleshooting common issues, you’re now equipped to navigate the road of optimal engine performance.
So, whether you’re a weekend DIYer or a seasoned mechanic, remember, getting your timing right is like giving your engine a friendly high-five—it just works better.
Happy tinkering!
Our experts recommended products: