Revving up your car’s audio experience has never been easier. Whether you’re a music lover, a DIY enthusiast, or just looking to enhance your car’s sound quality, the world of car stereo installation offers endless possibilities. In this guide, we’ll take you on a journey from deciding between DIY and professional installation to understanding the components that make up your car’s audio system. So, let’s hit the road to explore the ins and outs of installing a new car stereo!
Can I install my own car stereo?
Absolutely! Installing your own car stereo can be a rewarding and cost-effective DIY project. Many people with a bit of technical aptitude and the right tools successfully tackle this task. While it might seem a bit daunting at first, especially if you’re new to car electronics, there are plenty of resources and guides available to help you through the process.
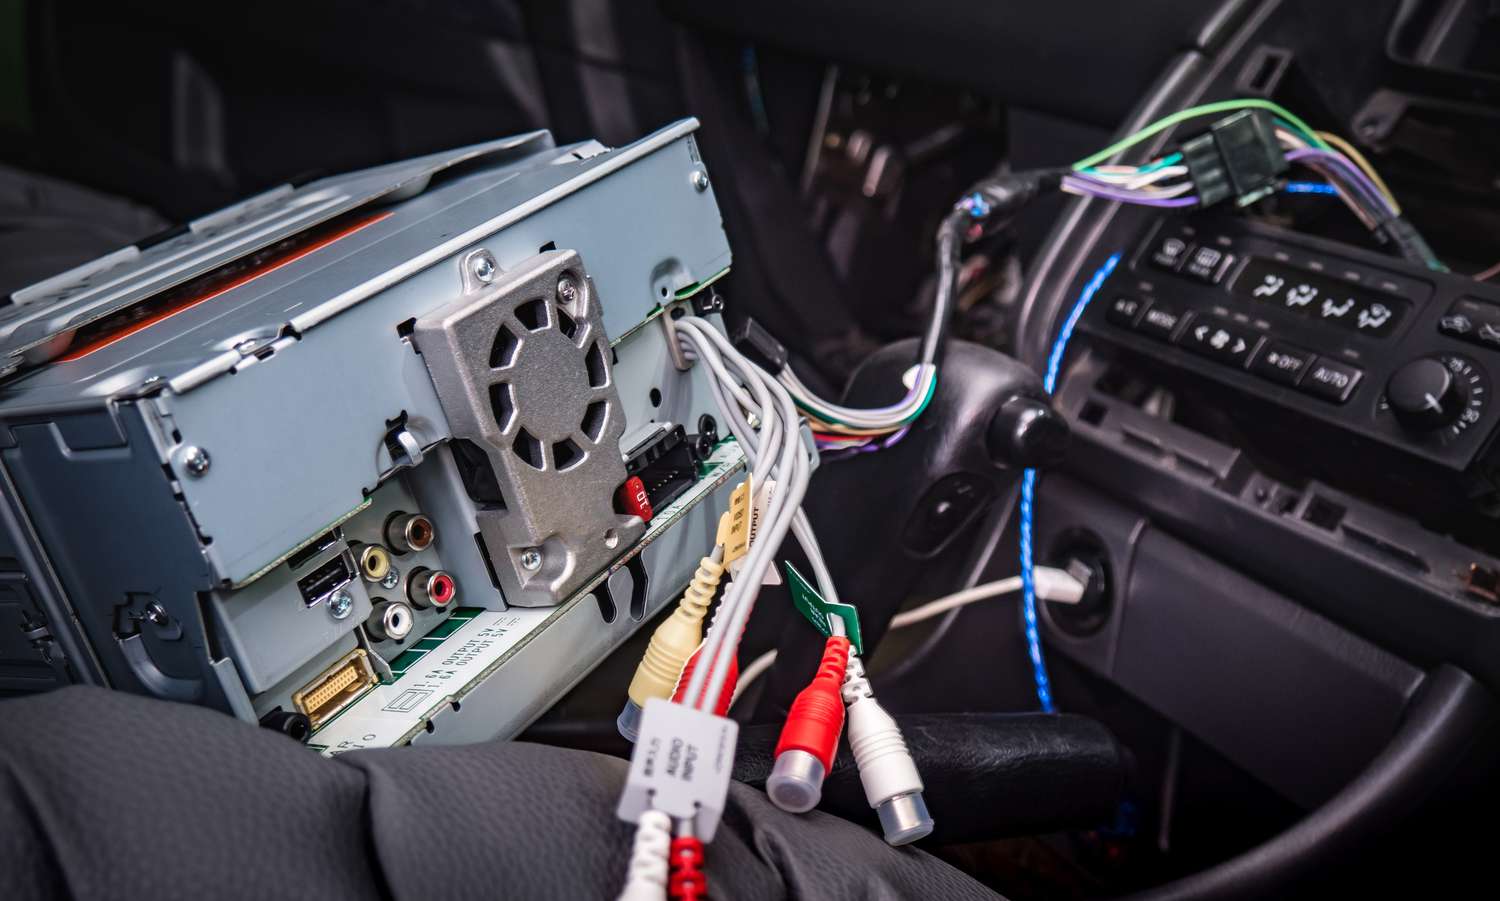
To get started, you’ll need to choose the right car stereo unit for your vehicle and gather the necessary tools and components. These typically include the new car stereo, a wiring harness adapter, a trim removal tool, wire connectors, and a set of screwdrivers.
The process involves removing the old stereo, connecting the wiring, and securing the new unit in place. It’s important to follow the specific instructions provided with your stereo and consult your vehicle’s wiring diagram to ensure a successful installation.
Before you dive in, assess your level of comfort with DIY projects and electronics. If you’re unsure or uncomfortable with the process, it might be a good idea to seek assistance from a professional. However, if you’re up for the challenge, installing your own car stereo can be a satisfying accomplishment, and it allows you to customize your vehicle’s audio system to your preferences.
How hard is it to install a car stereo?
Installing a car stereo can vary in difficulty depending on your level of technical expertise and the complexity of your vehicle’s existing audio system. Here’s a general idea of how hard it can be:
- Basic Difficulty (Easy)
If your car has a single-DIN stereo (the standard size for most car stereos) and your vehicle’s wiring is relatively straightforward, it can be a relatively easy DIY project. With the right tools, clear instructions, and some patience, you can often complete the installation in a few hours.
- Intermediate Difficulty
If your vehicle has a double-DIN stereo or more complex wiring due to additional features like steering wheel controls, a backup camera, or a factory amplifier, the installation becomes more challenging. You’ll need to pay close attention to wiring diagrams and might require adapters and extra steps to make everything work correctly.
- Advanced Difficulty (Hard)
Some vehicles have highly integrated audio systems that can be quite complex to work with. In such cases, the installation can be very challenging and might require advanced electrical and mechanical skills. You may need to disassemble a significant portion of your dashboard, which could be tricky and time-consuming.
Also Read: The Complete Guide to Car Waxing: From Assessing Your Needs to Maintenance Tips
How long does it take to install a car stereo?
The time it takes to install a car stereo can vary widely depending on several factors, including your level of experience, the complexity of your vehicle’s audio system, and whether you encounter any unexpected issues. Here’s a rough estimate of the time it might take:
- Basic Installation (1-2 hours)
If you have some experience with DIY projects and your car’s audio system is relatively simple, such as a single-DIN stereo without additional features, you can expect the installation to take around 1 to 2 hours.
- Intermediate Installation (2-4 hours)
For installations that involve a double-DIN stereo or additional components like steering wheel controls, backup cameras, or factory amplifiers, the process can take 2 to 4 hours. This extra time is needed to ensure all connections are correctly made and tested.
- Advanced Installation (4+ hours)
If your vehicle has a complex integrated audio system, or if you’re dealing with intricate wiring and need to disassemble a significant portion of the dashboard, the installation can take 4 hours or more. In some cases, it may require an entire day or more.
Keep in mind that these estimates are general guidelines and can vary widely. Your familiarity with car electronics and comfort with DIY tasks play a significant role. Additionally, unforeseen challenges, such as difficult-to-access wiring or compatibility issues, can add time to the installation process.
Before you begin, it’s a good idea to set aside ample time for the installation, ensure you have all the necessary tools and components, and read through the instructions provided with your car stereo. If you’re unsure about the time required or run into difficulties, don’t rush the process. Take your time to ensure a proper and safe installation. If you’re feeling overwhelmed, it’s always an option to seek professional installation services.
How much is it to install a new car stereo
The cost to install a new car stereo can vary widely depending on several factors. Here are some of the key factors that influence the installation cost:
- DIY vs. Professional Installation
If you install the stereo yourself, the cost is limited to the price of the stereo unit and any additional components you might need (such as wiring harness adapters). DIY installation is the most cost-effective option. However, if you opt for professional installation, you’ll need to pay for labor, which can vary by location and shop.
- Labor Costs
Professional installation costs can range from around $50 to $200 or more. The labor cost depends on the complexity of the installation, the shop’s hourly rate, and your location. Installing a basic single-DIN stereo with no additional features is usually less expensive than installing a double-DIN unit with advanced features or complex wiring.
- Additional Components
Depending on your vehicle and the stereo you choose, you may need additional components like wiring harnesses, mounting brackets, dash kits, and antenna adapters. These can add to the overall cost.
- Integration with Factory Features
If you want to retain features like steering wheel controls, backup cameras, or integrated amplifiers, you may need additional adapters and modules, which can increase the cost.
- Quality of the Stereo
The price of the new car stereo itself varies widely, depending on the brand, features, and quality. Basic models can be quite affordable, while high-end units with advanced features can be more expensive.
- Geographic Location
Labor costs and the availability of professional installers can vary by region. Urban areas may have a broader selection of installers, which can affect pricing.
As a rough estimate, if you’re getting a basic single-DIN car stereo professionally installed, you might expect to pay around $50 to $100 for labor, plus the cost of any additional components. If you’re installing a more advanced stereo with features like a touchscreen display, navigation, and smartphone integration, the labor costs may be higher.
How much is it to install a double din car stereo
The cost to install a double-DIN car stereo can range from approximately $100 to $300 for labor, in addition to the price of any required installation kits or adapters. Please note that these are rough estimates, and actual costs may vary based on location, vehicle complexity, and specific installation requirements.
How to install a car stereo amplifier
Installing a car stereo amplifier can significantly enhance your vehicle’s audio system. Here’s a general guide on how to install a car stereo amplifier:
Tools and Materials You’ll Need:
- Wiring kit (includes power wire, ground wire, remote turn-on wire, and RCA cables)
- Screwdrivers and wrenches
- Wire strippers and crimping tool
- Speaker wire
- Ring terminals and connectors
- Electrical tape or heat shrink tubing
- Panel removal tools (if necessary)
Step-by-Step Installation:
Step 1: Disconnect the Car Battery

Ensure your vehicle’s battery is disconnected to prevent electrical accidents while working on the system.
Step 2: Choose the Amplifier Location

Select a suitable location for the amplifier. It should be in a well-ventilated area, secure, and as close as possible to the head unit and speakers. Common locations include the trunk, under the front seats, or in the rear cargo area.
Step 3: Mount the Amplifier

Secure the amplifier using screws or mounting brackets. Ensure it’s firmly attached to prevent movement while driving.
Step 4: Run Power Wiring:

- Route the power wire from the battery to the amplifier location. Be sure to use a grommet when passing through the firewall to protect the wire.
- Connect the power wire to the battery’s positive terminal and install a fuse near the battery (as close to the battery as possible) to protect the system.

Step 5: Run Ground Wire:

- Find a suitable grounding point near the amplifier location. Ensure it’s free from paint, rust, or corrosion.
- Connect the ground wire securely to the grounding point.

Step 6:Connect Remote Turn-On Wire

Run the remote turn-on wire from the amplifier location to the head unit. Connect it to the remote turn-on lead (usually a blue wire) on the head unit’s wiring harness.
Step 6: Connect RCA Cables


Connect the RCA cables from the head unit’s RCA outputs to the amplifier’s RCA inputs. These cables transmit the audio signal.
Step 7: Run Speaker Wire

- Connect the amplifier’s speaker outputs to the speakers using high-quality speaker wire.
- Ensure you match the positive and negative terminals correctly to maintain proper phasing.
Step 8: Secure and Bundle Wires
Neatly bundle and secure the wiring using zip ties or mounting clips to prevent interference with moving parts or rattling.
Step 9: Connect and Test
Reconnect the car battery. Turn on the vehicle and the stereo to test the amplifier. Make any necessary adjustments to the amplifier’s settings, such as gain, crossover, and equalization, to achieve the desired sound quality.
Step 10: Secure Panels and Trims

Reassemble any panels or trims that you removed during the installation.
Step 11: Final Check
Ensure all connections are secure and that there are no loose wires that could potentially cause a short circuit.
Remember to consult your amplifier’s manual and your vehicle’s wiring diagram for specific details, as the installation process may vary slightly depending on the amplifier and vehicle model. If you’re not comfortable with the installation, it’s advisable to seek professional assistance to avoid damaging your vehicle’s electrical system or audio components.
How to install a car stereo capacitor
Installing a car stereo capacitor is a straightforward process. Here are simplified steps:
Tools and Materials You’ll Need:
- Car stereo capacitor
- Screwdriver
- Ring terminals
- Wrench or pliers
- Wire strippers
- Electrical tape
Installation Steps:
Disconnect the Car Battery
Start by disconnecting the car battery to ensure safety while working on your electrical system.
Select Mounting Location
Choose a secure spot near your amplifier to mount the capacitor. This could be in the trunk or under a seat.
Connect the Power Wire:
- Connect one end of a power wire to the positive terminal of the car battery.
- Securely attach the other end to the positive terminal of the capacitor.
Connect the Ground Wire:
- Attach a ground wire to the negative terminal of the capacitor.
- Connect the other end to a metal part of your car’s chassis. Ensure it’s a clean, unpainted area for good ground.
Wire in the Amplifier
Use a separate wire to connect the capacitor’s positive terminal to the positive terminal of your amplifier.
Secure the Wiring
Ensure all connections are secure and insulated with electrical tape. This prevents accidental short circuits.
Reconnect the Battery
Reconnect your car’s battery and check the connections for safety and proper operation.
How do you wire up a car stereo?
To wire up a car stereo:
Tools Needed:
- Car stereo unit
- Wiring harness adapter
- Crimping tool
- Screwdrivers
- Panel removal tools (if needed)
Steps:
- Prepare the wiring harness by connecting it to the stereo’s wires.
- Disconnect the car battery for safety.
- Remove the old stereo (if applicable).
- Connect the wiring harness adapter to the stereo and your car’s wiring.
- Connect the antenna cable to the stereo.
- Secure the new stereo in place.
- Reconnect the car battery.
- Test the stereo to ensure it’s working correctly.
- Reattach any trim panels that were removed.
Using a wiring harness adapter that matches your car’s make and model simplifies the process. Ensure secure connections and test for proper functionality. If in doubt, consult the stereo’s manual or seek professional help to avoid electrical issues.
Does a car stereo need an amplifier?
A car stereo doesn’t necessarily need an external amplifier, but whether you need one depends on your audio preferences and the quality of your existing speakers. Here’s a simplified explanation:
No External Amplifier: Most car stereos come with a built-in amplifier, which can provide sufficient power to drive factory speakers and deliver sound to a moderate level. If you’re content with the sound quality and volume of your factory speakers, you may not need an external amplifier.
When You Might Need an Amplifier
- Upgrading Speakers
If you’re upgrading to high-quality aftermarket speakers or adding subwoofers, an external amplifier can provide the additional power needed to make these components sound their best.
- Crisper Sound
An amplifier can help improve sound quality, providing clearer and more detailed audio, especially at higher volumes.
- Increased Volume
If you want a significantly louder audio system than what your car’s built-in amplifier can deliver, an external amplifier is essential.
- Bass Enhancement
For powerful and deep bass, a dedicated subwoofer amplifier can make a noticeable difference.
Can any stereo fit in any car?
No, not every stereo will fit in any car. Car stereos come in different sizes and configurations, and compatibility depends on several factors:
- Size
Car stereos come in various sizes, with single-DIN and double-DIN being the most common. Single-DIN units are smaller, while double-DIN units are larger. The space available in your car’s dashboard determines which size will fit. Some vehicles may also have non-standard sizes.
- Mounting Location
The location of the stereo in your car may vary. Some are in the dashboard, while others may be in the center console, under the dashboard, or even integrated into other components. The available space and the mounting method used will affect compatibility.
- Wiring and Compatibility
Different car models have various wiring harnesses and connectors. The stereo you choose should be compatible with your car’s wiring to ensure it can be properly connected and integrated.
- Features and Functions
Some car stereos have advanced features, like navigation systems, backup cameras, or steering wheel control integration. The compatibility of these features with your vehicle’s electronics and wiring is important.
- Trim and Aesthetics
The aesthetics of the stereo, including the trim and faceplate, should match the design of your car’s interior to appear seamless.
Can I connect my phone to my car stereo?
Yes, you can connect your phone to your car stereo, and there are several ways to do it, depending on your car’s audio system and your phone’s capabilities:
- Bluetooth
Many modern car stereos come with Bluetooth connectivity. You can pair your phone with the car stereo via Bluetooth, allowing you to play music wirelessly and make hands-free calls. Ensure that your phone’s Bluetooth is turned on, and follow the pairing instructions in your car’s manual.
- AUX Input
If your car stereo has an AUX (auxiliary) input, you can connect your phone using a 3.5mm audio cable. Plug one end into the headphone jack of your phone and the other into the AUX input on your car stereo. Select the AUX input source on your car stereo to hear the phone’s audio.
- USB Connection
Some car stereos have USB ports that can be used to connect your phone. You’ll need a USB cable compatible with your phone to establish the connection. This can also allow you to charge your phone while connected.
- CarPlay (iOS) or Android Auto (Android)
If your car stereo is equipped with CarPlay (for iPhones) or Android Auto (for Android devices), you can connect your phone to your car’s infotainment system to access apps, navigation, and other features directly from the car’s display. You may need to install a specific app or update your car’s software for this functionality.
- FM Transmitter
In older vehicles without modern connectivity options, you can use an FM transmitter. These devices plug into your phone’s headphone jack and broadcast audio to a specific FM frequency. Tune your car’s radio to that frequency to hear your phone’s audio.
- Bluetooth Adapters
If your car stereo lacks built-in Bluetooth, you can add Bluetooth connectivity by using a Bluetooth adapter that plugs into the AUX input.
Can you put a new stereo in an old car?
Yes, you can put a new stereo in an old car. Installing a new car stereo in an older vehicle is a common and effective way to upgrade your audio system and enjoy modern features. Here’s how you can do it:
-
Select a Compatible Stereo
Choose a car stereo that fits the available space in your old car’s dashboard. Most older cars have a single-DIN (2-inch tall) slot, but some may have a double-DIN (4-inch tall) slot. Ensure the stereo’s size matches your car’s specifications.
-
Get the Necessary Installation Accessories
You may need additional installation accessories, such as a wiring harness adapter and a dash kit, to make the new stereo compatible with your car’s wiring and to ensure a secure fit in the dashboard. These accessories are readily available and vary by car make and model.
-
Disconnect the Battery
For safety, disconnect the car’s battery before starting the installation to avoid electrical accidents.
-
Remove the Old Stereo
Use the appropriate tools to remove the old car stereo from the dashboard. This may involve removing trim panels, screws, or clips.
-
Connect the Wiring
Connect the wiring harness adapter to the car’s wiring. The adapter’s wires will match the colors of the new stereo’s wires, making it easy to connect them.
-
Attach the New Stereo
Slide the new car stereo into the mounting bracket or the dashboard opening. Secure it using screws or clips, following the manufacturer’s instructions.
-
Reconnect the Battery
Reconnect the car’s battery and ensure all connections are secure.
-
Test the Stereo
Turn on the car and the new stereo to test its functionality. Ensure all speakers are working, and that the unit operates correctly.
-
Replace Trim Panels
Reattach any trim panels or covers you removed during the installation.
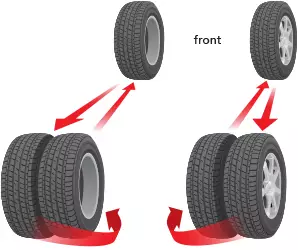
What is the difference between single DIN and double DIN?
The primary difference between single-DIN and double-DIN car stereos is their size and the features they can accommodate. Here’s a brief overview:
Single DIN:
- Size
Single DIN car stereos typically measure 2 inches (50mm) in height and 7 inches (180mm) in width.
- Features
Single DIN units are more compact and offer basic audio features, such as radio, CD players, and limited display capabilities.
- Limited Screen Size
Due to their smaller size, single DIN stereos often have smaller screens, making it challenging to display extensive information or utilize advanced touchscreen features.
- Compatibility
Single DIN units are common in older vehicles and are often easier to install in smaller dashboards.
Double DIN:
- Size
Double DIN car stereos are larger, measuring 4 inches (100mm) in height and 7 inches (180mm) in width.
- Features
Double DIN units offer more space for advanced features, such as touchscreen displays, GPS navigation, DVD or multimedia players, smartphone integration (Apple CarPlay and Android Auto), and more. They provide a more comprehensive and interactive user interface.
- Screen Size
The larger size of double DIN stereos allows for larger and more user-friendly touchscreen displays, making it easier to interact with multimedia features and access information.
- Compatibility
Many modern vehicles are designed to accommodate double DIN stereos due to their increased functionality.
What does double DIN mean in car stereos?
“Double DIN” refers to a specific size standard for car stereo head units. DIN stands for “Deutsches Institut für Normung,” which translates to “German Institute for Standardization.” Double DIN car stereos are larger and more feature-rich than their single DIN counterparts.
The key characteristics of a double DIN car stereo are:
- Size
A double DIN head unit typically measures approximately 4 inches (100mm) in height and 7 inches (180mm) in width. This larger size allows for a more extensive display area and accommodates advanced features like touchscreen displays.
- Features
Double DIN car stereos provide more space for advanced multimedia features, such as touchscreen displays, GPS navigation, DVD or multimedia players, smartphone integration (Apple CarPlay and Android Auto), and a broader range of audio and video options.
- User Interface
The larger display in double DIN units makes it easier to interact with multimedia features and access information. This is especially advantageous for functions like navigation, smartphone integration, and entertainment.
- Compatibility
Many modern vehicles are designed to accommodate double DIN stereos due to the increased functionality they offer. However, older vehicles may have single DIN slots in the dashboard, so a modification or adapter may be needed to install a double DIN unit.
Conclusion
Car stereo technology has evolved significantly over the years, offering a range of options to enhance your audio experience in vehicles. The choice between single DIN and double DIN units depends on your needs and the space available in your vehicle’s dashboard. Single DIN units are compact and suitable for basic audio functions, while double DIN units provide a larger canvas for advanced multimedia features. With the advent of smartphone integration, touchscreen displays, and comprehensive connectivity options, car stereos have become versatile entertainment hubs. Regardless of your choice, upgrading your car stereo can bring a new level of enjoyment and convenience to your driving experience.